How to Insulate and Cool a Room for a Walk-In Cold Room Setup

Turning a regular room into a walk-in cold room might sound tricky, but it’s easier than you think with the right steps. Insulation is the backbone of your setup—it keeps the cold air in and the warm air out. A proper cooling system ensures your walk-in cold room stays at the perfect temperature. Don’t forget to seal every gap and crack to prevent energy loss. These steps not only make your walk-in cold room efficient but also save you money in the long run. Ready to get started?
Key Takeaways
Pick a good spot for your cold room. Basements or garages work well because they stay cooler naturally.
Use strong insulation like foam boards or spray foam. This traps cold air and saves energy.
Get a cooling unit that fits your room size and items. A proper setup cools evenly and works better.
Close all gaps and cracks to block warm air. Check door seals and insulation often to keep it efficient.
Take care of your cold room by cleaning and checking it regularly. This helps it last longer and work smoothly.
Planning for a Walk-In Cold Room
Choosing the Right Room
Start by picking a good room for your cold setup. Choose a space that’s easy to reach and big enough for your needs. Basements or garages are great options since they stay cooler naturally. Check for proper airflow and fix any big cracks or leaks. If sunlight hits the room, add curtains or shades to block the heat.
Think about what you’ll store in the cold room. Will it be food, drinks, or other items? This will help you decide how much space is needed. A small room works for home use, but bigger rooms are better for businesses.
Measuring and Planning the Layout
After choosing the room, measure it carefully. Use a tape measure to check the size of the walls, floor, and ceiling. This will help you know how much insulation and shelving to buy.
Plan the layout to make the space useful. Follow the table below for tips:
Key Practice | Impact/Benefit |
|---|---|
Lowers contamination risks by 60% | |
Adjustable shelving | Saves vertical space and boosts efficiency |
Inventory management systems | Cuts food waste by 6% and restocking time by 20% |
Regular maintenance | Reduces energy bills by up to 25% |
These tips will help you build a cold room that works well and saves money.
Tools and Materials You’ll Need
To start building, gather the right tools and supplies. Here’s a simple list:
Drainage: Floors with no leaks to stop water buildup.
Lighting: LED lights that use less energy and stay cool.
Regulatory Compliance: Follow local rules for safety and cleanliness.
Insulation Materials: Foam panels or spray foam for walls, floors, and ceilings.
Shelving Units: Adjustable shelves to fit more items.
Sealing Supplies: Caulk or weatherstripping to close gaps and cracks.
Having these ready will make the job easier and faster.
Insulating the Coldroom
Good insulation is key for a working walk-in coldroom. It traps cold air inside and blocks heat from entering. This keeps the temperature steady and lowers energy costs. Let’s go through the steps.
Wall Insulation
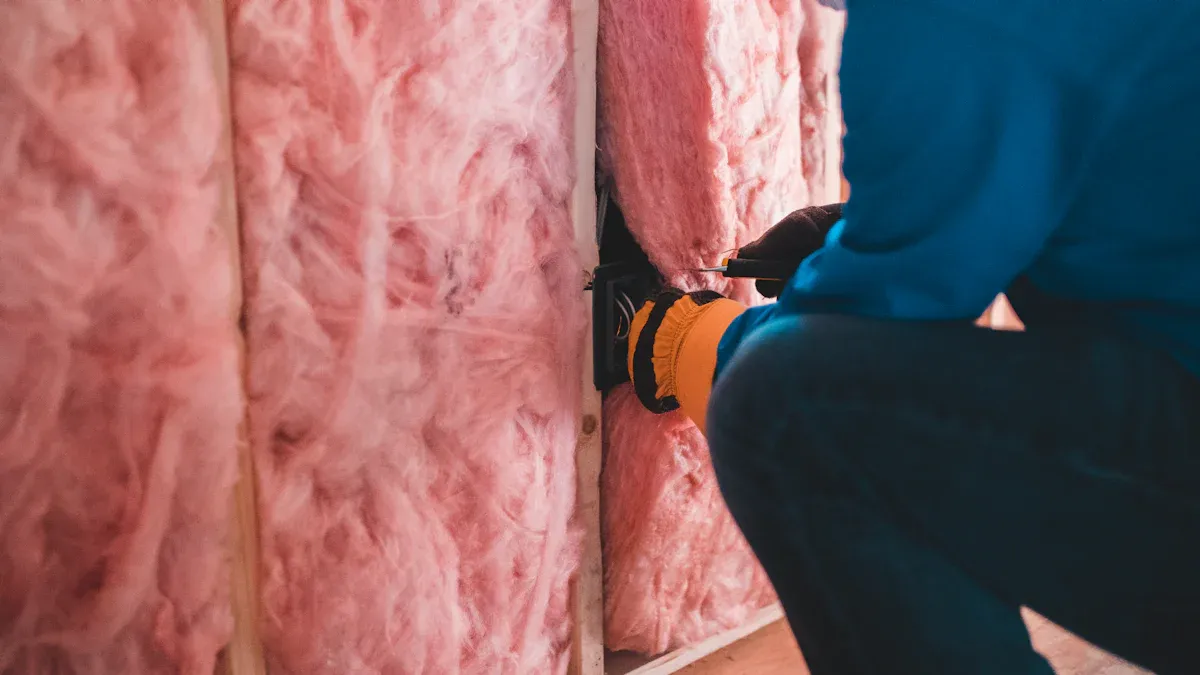
Start with the walls since they cover the most space. Use strong insulation like foam panels or spray foam. These materials stop heat from passing through. Attach the panels to the walls without leaving gaps. Seal the edges with caulk or weatherstripping to close any openings.
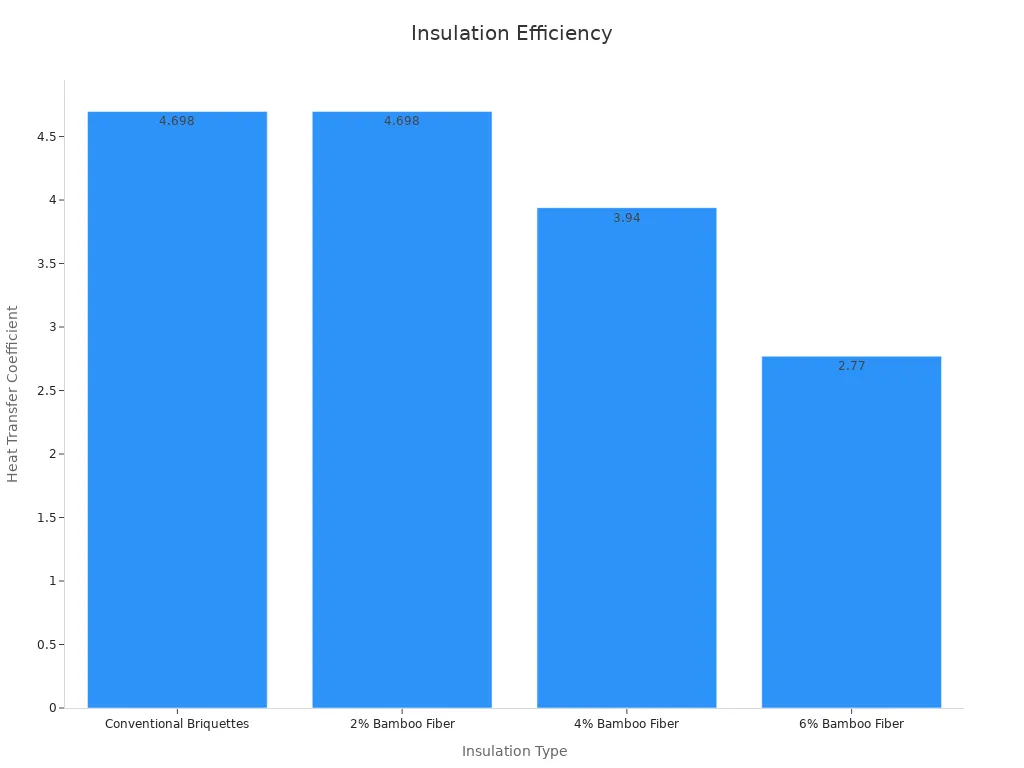
Check the table below to see how insulation improves energy use:
Insulation Type | Reduction (%) | |
|---|---|---|
Conventional Briquettes | 4.698 | N/A |
2% Bamboo Fiber | 4.698 | N/A |
4% Bamboo Fiber | 3.94 | N/A |
6% Bamboo Fiber | 2.77 | 41.0% |
This shows that better insulation, like bamboo fiber, cuts heat transfer and saves energy.
Floor Insulation
Don’t forget the floor! A bad floor lets cold air escape and wastes energy. Use foam boards or polyurethane foam for the best results. Spread the insulation evenly on the floor. Cover it with a strong, water-resistant layer like vinyl or epoxy. This helps with insulation and makes cleaning easier.
Thicker insulation works better. The chart below shows how it reduces heat and cold loss:
Ceiling Insulation
The ceiling is important too. Heat rises, so insulate the ceiling to keep the room cool. Spray foam works well for a smooth finish. Foam panels are cheaper but still effective. Seal gaps where the ceiling meets the walls to stop air leaks.
If the ceiling is high, add a drop ceiling with insulation. This lowers the amount of air to cool, saving energy.
By insulating the walls, floor, and ceiling, you’ll have a coldroom that works well and saves money over time.
Best Insulation Materials
Picking the right insulation is key for a good coldroom. Not all materials work the same, so choose ones that block heat well and last long. Here are some top choices:
1. Rigid Foam Panels
These panels are a favorite for coldrooms. They are light, simple to use, and keep heat out well. You can cut them to fit walls, floors, and ceilings. Polystyrene or polyurethane panels work best.
Tip: Pick panels with a high R-value. Higher R-values mean better insulation.
2. Spray Foam
Spray foam is another great choice. It grows to fill cracks and gaps, making a tight seal. It’s perfect for uneven surfaces and hard-to-reach spots. It also makes your coldroom stronger.
3. Mineral Wool
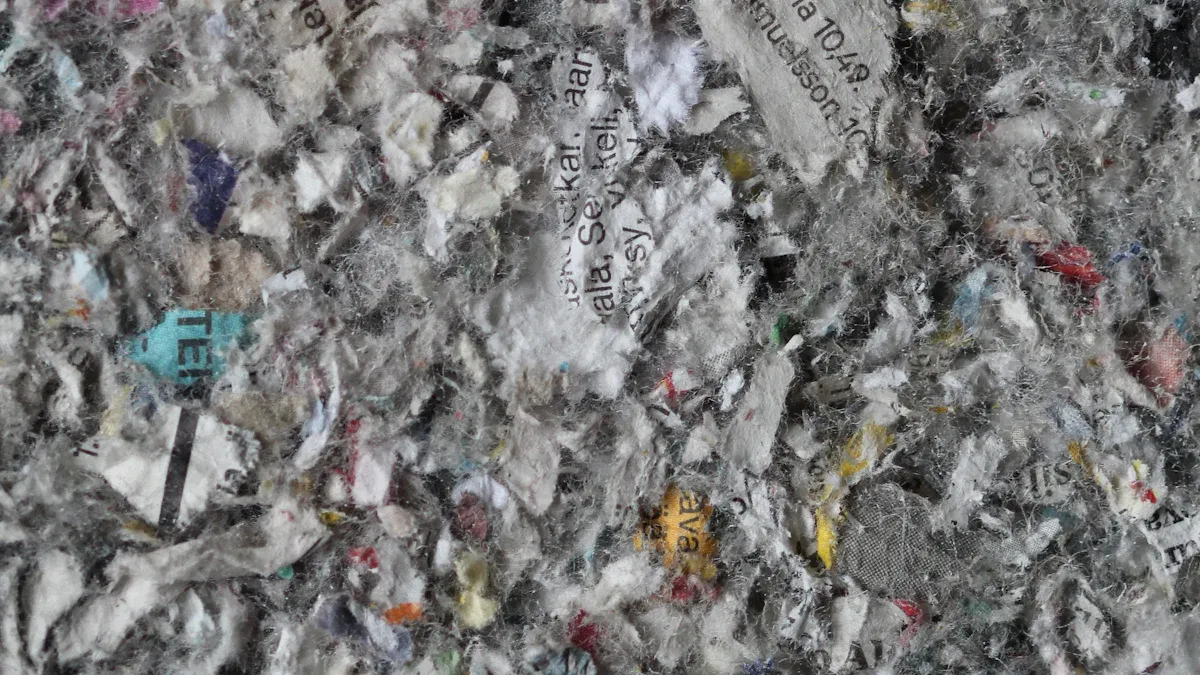
Mineral wool is eco-friendly and made from recycled stuff. It blocks heat well and resists fire, adding safety. But it doesn’t seal air leaks as well as foam.
4. Vacuum Insulated Panels (VIPs)
For the best insulation, try vacuum insulated panels. They are thin but stop heat very well. They cost more but are great for high-quality coldrooms.
Note: Use a mix of materials for the best results. For example, spray foam for gaps and rigid panels for big areas.
Choosing the right insulation will keep your coldroom cool and save energy for a long time.
Installing a Cooling System
A good cooling system is key for your walk-in cold room. It keeps the temperature steady and your items fresh. Let’s break it into three easy steps.
Choosing a Cooling Unit
Pick the right cooling unit for your cold room. Match the unit to the room size and stored items. Bigger rooms or frozen goods need stronger units. Look for features like multi-stage cooling and auto temperature resets. These save energy and work better.
Here’s a quick comparison of cooling unit features:
Metric | Specification |
|---|---|
Sensor accuracy (Drybulb/Wetbulb) | ±2°F over 40°F to 80°F |
Enthalpy accuracy | ±3 Btu/lb over 20 Btu/lb to 36 Btu/lb |
Relative humidity accuracy | ±5% over 20% to 80% RH |
Mechanical cooling capacity | Minimum of two stages for units > 65,000 Btu/hr |
Supply air temperature reset | Automatic reset based on building loads/outdoor air temperature |
Choose a unit with these specs for the best results.
Setting Up the Cooling System
After getting your cooling unit, set it up properly. Place it where air can flow evenly. Keep the area around it clear to avoid uneven cooling. Seal gaps around the unit to block warm air.
Follow these tips for setup:
Check door seals weekly to keep insulation strong.
Clean condenser coils every three months for efficiency.
Record refrigerant pressure often to check performance.
Use energy-saving compressors to cut costs.
These steps will help your cold room work well and last longer.
Adjusting Temperature Settings
Set the temperature based on what you store. Dairy and eggs need 0-4°C to stay safe. Fruits and veggies do best at 0-8°C. Frozen goods need -18°C to stay fresh. Adjust and check settings often.
Tip: Don’t overload the room. Keep items neat for better airflow and cooling.
By picking the right unit, setting it up well, and adjusting temperatures, your cold room will work efficiently and reliably.
Sealing and Ventilation
Sealing Gaps and Cracks
Sealing your cold room properly is one of the most important steps to keep it efficient. Even small gaps or cracks can let warm air sneak in, making your cooling system work harder. This wastes energy and raises your electricity bill.
Start by inspecting the door seals. If they feel loose or worn out, replace them immediately. Use caulk or weatherstripping to seal any cracks around windows, walls, or corners. Don’t forget to check the area around the cooling unit. Gaps here can let warm air in and reduce cooling efficiency.
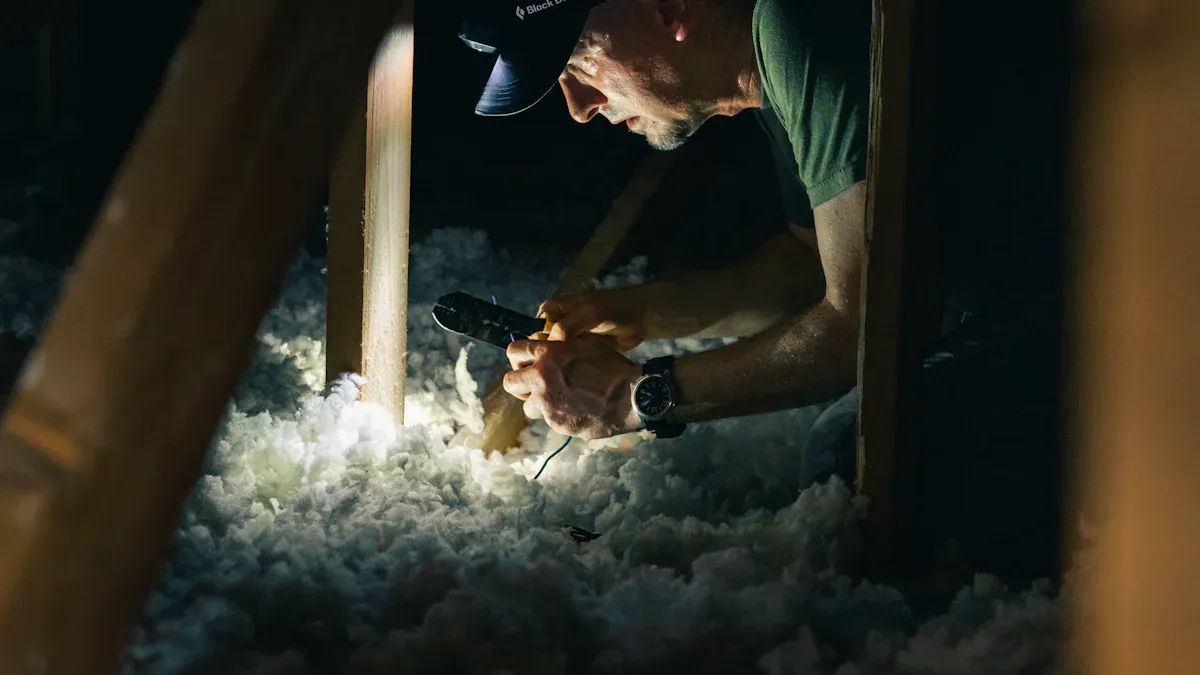
Tip: Shine a flashlight inside the room with the lights off. If you see light escaping through cracks, seal those spots right away.
Ventilation Requirements
Proper ventilation keeps your cold room running smoothly. Without it, the cooling system might overheat or fail to maintain a steady temperature. Make sure air vents are clear and unblocked. This allows air to circulate freely and prevents hot spots inside the room.
If your cold room is in a basement or garage, consider adding a small exhaust fan. This helps remove excess heat from the cooling unit and keeps the room balanced.
Address insulation gaps to avoid hot air intrusion.
Ensure air vents are not blocked to maintain airflow and temperature stability.
These simple steps can make a big difference in how well your cold room performs.
Preventing Moisture Buildup
Moisture is the enemy of a cold room. It can lead to mold, bad smells, and even damage your stored items. To prevent this, keep the room dry and well-sealed. Use a dehumidifier if you notice condensation on the walls or floor.
Pro Tip: Install a vapor barrier during insulation. This extra layer blocks moisture from entering the room.
By sealing gaps, ensuring ventilation, and controlling moisture, you’ll create a cold room that’s efficient and long-lasting.
Maintaining Your DIY Cold Room
Taking care of your DIY cold room is simple. Regular upkeep helps it work well, saves energy, and protects your stored items. Let’s look at the main steps.
Cleaning and Inspections
A clean cold room works better! Clean it daily to stop dirt and germs. Wipe surfaces and check door seals for damage. Broken seals let warm air in, making the cooling system work harder.
Here’s a table to help with cleaning and checks:
Task Frequency | Maintenance Task | Description |
|---|---|---|
Daily | Wipe surfaces | Keep surfaces clean for hygiene. |
Daily | Check door gaskets | Look for damage to stop heat from entering. |
Daily | Verify temperature logs | Make sure the temperature stays correct. |
Weekly | Clean coils | Remove dust from coils to improve cooling. |
Weekly | Check pressure systems | Ensure refrigerant levels are good. |
Monthly | Schedule inspections | Get professional checks to ensure everything works. |
Monthly | Update maintenance logs | Write down all maintenance tasks for records. |
Follow this schedule to keep your cold room running longer and avoid big repairs.
Monitoring Temperature and Humidity
Temperature and humidity are very important for your cold room. Use good tools to track them. Even small changes can ruin stored items, so stay alert.
Here’s a comparison of useful monitoring tools:
Device Name | Temperature Range | Humidity Range | Temperature Accuracy | Humidity Resolution | Temperature Resolution |
|---|---|---|---|---|---|
Mini Temperature and Humidity Meter LB-10MTH | -30 °C ~ 70 °C | 0 % RH ~ 100 % RH | N/A | 0.1 | 0.1 °C/°F |
Miniature Data Logger LB-11MDL | -30 to 70℃ (-22 to 158℉) | 0 to 100% RH | ± 0.5℃ | N/A | 0.1℃ (0.2℉) |
Temperature and Humidity Meter LB-10TPM | -35 °C ~ 100 °C | 0 % RH ~ 100 % RH | N/A | 0.1 | 0.1 °C/°F |
Choose a tool that fits your needs and check it often. Fix any problems quickly if readings seem off.
Addressing Safety Concerns
Safety is very important. A poorly kept cold room can cause problems like bad food or electrical issues. Check all wires and connections to make sure they’re safe. Broken wires can cause accidents.
Add a vapor barrier during insulation to stop moisture. Too much moisture can cause mold, which is bad for health and stored items. If you see water buildup, use a dehumidifier to dry the room.
Tip: Keep a fire extinguisher nearby for safety. Make sure it works for electrical fires.
By following these tips, your cold room will stay safe and work well every day.
Building a walk-in cold room might feel hard, but breaking it into smaller steps makes it easier. Steps like planning, adding insulation, setting up cooling, and sealing gaps are all important. With the right tools and some effort, you can make a space that keeps things fresh and saves money on energy.
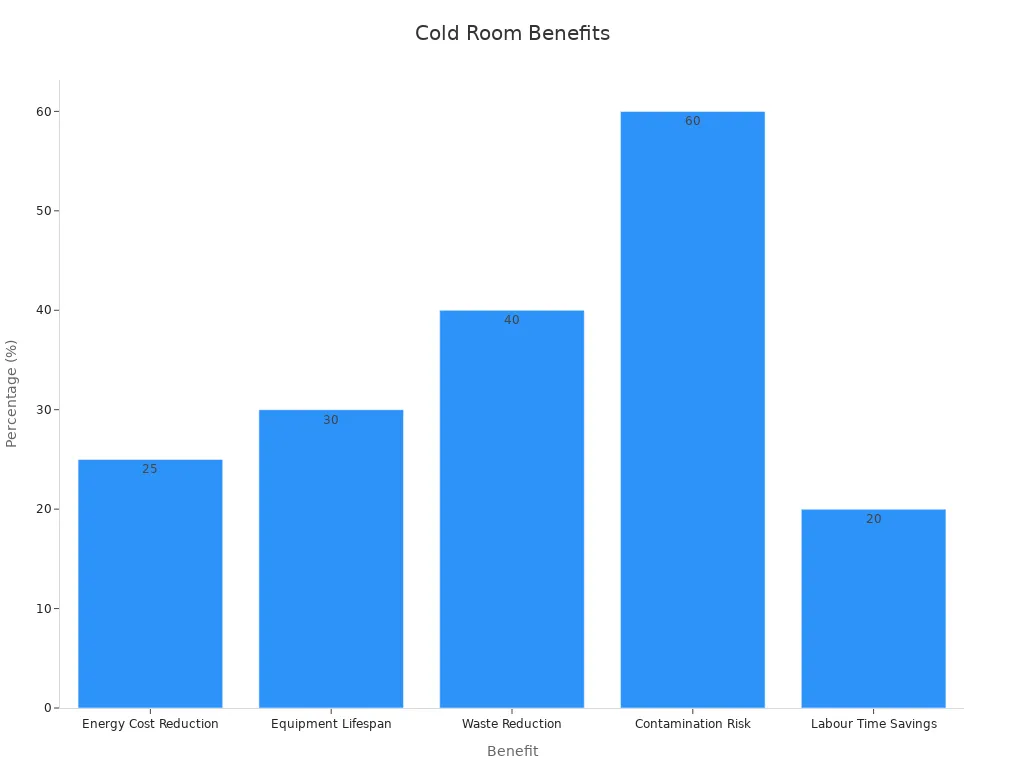
A good cold room does more than store items. It lowers energy bills by 25%, makes equipment last 30% longer, and reduces waste by 40%. See the table below for more details:
Benefit | Statistic |
|---|---|
Energy Cost Reduction | Saves up to 25% on energy costs |
Equipment Lifespan | Increases lifespan by 30% |
Waste Reduction | Lowers waste by 40% |
Contamination Risk | Reduces risks by 60% |
Labor Time Savings | Cuts restocking time by 20% |
One manager said, “After fixing our cold rooms, energy bills dropped 18% in a year.” This proves small changes can save a lot. Why wait? Start your cold room project now and enjoy the rewards of an organized, efficient space.
FAQ
1. How much does it cost to build a walk-in cold room?
The cost depends on the size, materials, and cooling system. For a small DIY setup, you might spend $1,000–$3,000. Larger or professional-grade cold rooms can cost $5,000 or more.
Tip: Plan your budget carefully and compare prices for materials and cooling units.
2. Can I use my regular room as a cold room?
Yes, you can! Just make sure to insulate the walls, floor, and ceiling properly. Add a cooling system and seal all gaps to keep the cold air in.
Note: Rooms in basements or garages work best since they’re naturally cooler.
3. What’s the best insulation material for a cold room?
Rigid foam panels and spray foam are top choices. They’re durable, easy to install, and provide excellent insulation. For eco-friendly options, try mineral wool.
Pro Tip: Use a mix of materials for better results, like spray foam for gaps and rigid panels for large areas.
4. How do I prevent mold in my cold room?
Keep the room dry and well-ventilated. Install a vapor barrier during insulation and use a dehumidifier if needed. Regular cleaning also helps.
Reminder: Check for moisture buildup often, especially around corners and the cooling unit.
5. How often should I maintain my cold room?
Inspect and clean your cold room weekly. Check door seals, clean condenser coils, and monitor temperature logs daily. Schedule professional inspections monthly for optimal performance.
Tip: Keep a maintenance log to track tasks and avoid missing important checks.
See Also
Creating An Efficient Cold Room For Optimal Performance
Choosing The Ideal Walk-in Cold Storage Solution
Establishing A Cold Room To Preserve Fresh Produce
Essential Advice For Managing Cold Room Temperatures Effectively