Walk-in cooler choices made easy for your shop
Choosing the right walk-in cooler for your shop can feel overwhelming at first. You need to think about your space, how much cooling you need, and what certifications matter for safety. Energy efficiency helps you save money each month. Installation and design affect how your products look and how easy it is to use the cooler. Your budget also plays a big role in your decision.
Key Takeaways
Think about how much storage you need. Know what items you will keep to pick the right size cooler. Measure your space with care. Check the size again so you do not have problems later. Look for coolers that save energy. Good insulation and energy-saving parts help lower your bills. Make sure your cooler has the right certifications. This keeps your business safe and healthy. Plan for easy use and cleaning. A door in a good spot and a design that is easy to clean will help your cooler work well.
Assess Your Needs & Space
Storage Requirements
You need to start by understanding your food storage needs. Think about what types of products you will keep in your walk-in cooler. Some shops store dairy, meat, or fresh produce. Others may need space for beverages or prepared foods. The amount and type of products you store will affect your sizing choices.
To make the best decision, you should consider four main factors that impact your storage requirements:
Product Load: Every time you add new items to your cooler, they bring in heat. The amount of heat depends on how much you store, the temperature of the products, and how cold you want them to be.
Conduction Load: Heat can enter your cooler through the walls, floor, and ceiling. The quality of insulation and the difference between inside and outside temperatures matter here.
Service Load: People, lights, and equipment inside the cooler add extra heat. Opening the door often also increases the temperature.
Respiration Load: Fresh fruits and vegetables continue to produce heat after harvest. If you store produce, you need to plan for this extra heat.
You should review these factors to match your walk-in cooler to your daily operations. This will help you avoid wasted energy and spoiled goods.
Measuring for the Right Size Cooler
You must measure your available space before you choose the right size cooler. Start by measuring the length, width, and height of the area where you want to install the cooler. Make sure to check for any obstacles like pipes, doors, or low ceilings. Leave enough room for people to move around and for the door to open fully.
Here are some sizing tips to help you:
Use a tape measure for accurate results.
Mark the space on the floor with tape to visualize the footprint.
Check that the cooler will fit through doorways during delivery.
You should also think about future growth. If you expect your business to expand, plan for extra space now. Good space requirements planning will save you time and money later.
Tip: Always double-check your measurements before ordering your cooler. A small mistake can lead to big installation problems.
Choose the Right Size Cooler
Standard vs. Custom Options
You face two main choices when picking the right size cooler for your shop: standard or custom. Standard coolers come in common sizes and shapes. These models fit most shops and offer quick delivery. You can save money and time with a standard unit. Manufacturers design them to meet the needs of many businesses.
Custom coolers give you more flexibility. You can match the cooler to your unique space or special storage needs. If your shop has an odd layout or limited room, a custom cooler may fit better. You can choose the height, width, and depth. You can also add special features like extra doors or windows. Custom options cost more and take longer to build, but they solve problems that standard models cannot.
Think about your products and how much you need to store. If you sell a lot of fresh food or beverages, you may need a larger cooler. If your menu changes often, a flexible design helps you adjust. Always check your budget and timeline before you decide.
Tip: Measure your space carefully and compare it to the cooler’s dimensions. This step helps you avoid costly mistakes.
Door Placement & Shelving
Door placement plays a big role in how you use your walk-in cooler. You want to make sure the door opens in a spot that makes loading and unloading easy. The right door location can improve your workflow and save time each day.
Proper door sizing prevents air leaks and keeps your cooler running efficiently.
Standard door sizes make it easy to replace doors or panels in the future.
The opening should be wide enough for carts or pallets to pass through without trouble.
If the door does not line up with your work area, you may lose energy and slow down your team.
Shelving also matters. Good shelving lets you organize products and use every inch of space. Adjustable shelves help you store items of different heights. Strong shelves hold heavy boxes and keep your cooler safe. Place shelves near the door for fast access to popular items. Use the back of the cooler for long-term storage.
You should plan your shelving layout before you install the cooler. This step helps you get the most out of your investment. A smart design keeps your products fresh and your team happy.
Note: A well-planned door and shelving setup can boost your shop’s efficiency and protect your products.
Walk-in Cooler Features & Certifications
Cooling Performance & Insulation
You want your walk-in cooler to keep food safe. The cooler needs good insulation and a strong refrigeration system. Thick insulation stops heat from getting inside. This helps keep the temperature steady. Good insulation also uses less energy. Check the insulation rating before you buy. A cooler with good insulation saves you money.
Energy Efficiency & Cost Savings
Energy-efficient coolers use less electricity. You pay less for your utility bills. Look for LED lighting, high-efficiency compressors, and self-closing doors. These features help keep cold air inside. Saving energy helps you save money over time. You can spend the extra money on your business. Pick the right size cooler for your shop. If the cooler is too big, it wastes energy. If it is too small, it may not work well.
Tip: Ask about energy ratings when you shop for a cooler. Small changes can lower your costs.
ETL, UL, NSF Certifications
Certifications show your cooler meets safety and health rules. You should look for three main certifications:
Certification | Implication |
|---|---|
ETL | Shows the cooler follows U.S. safety rules and building codes. This is important for passing city inspections. |
UL | Means the cooler is tested for safety and strength. It is good for food service shops. |
NSF | Shows the cooler meets health and safety rules for design, making, use, and labels. |
These certifications help you pass inspections and keep customers safe. You can trust your equipment is safe and works well.
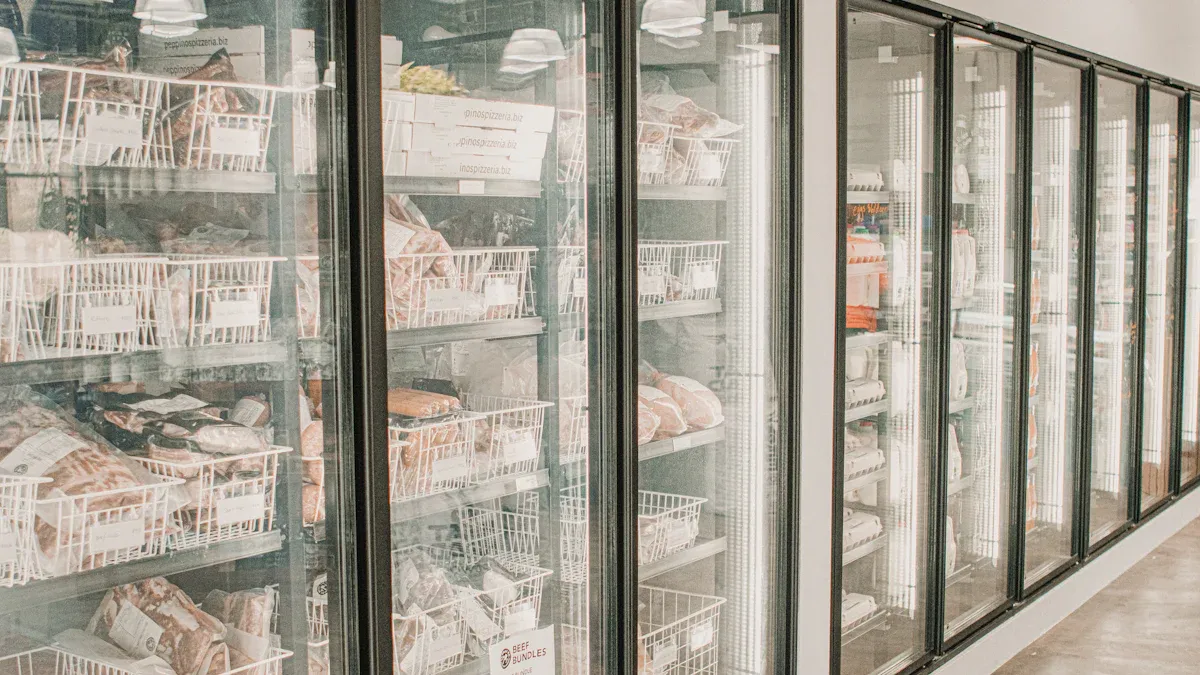
Design & Presentation Impact
The design of your cooler changes how your shop looks and works. A clean design makes your products look better. Glass doors let people see inside without opening the door. Good lighting makes food look fresh. Shelving and layout help you organize products. You can make items easy to reach and sell more. A smart design helps your team work faster and keeps your shop looking nice.
Install & Maintain Your Cooler
Installation Types & Timeline
You have a few ways to install your walk-in cooler. Some coolers come already put together. These are ready to use right away and save time. Other coolers come in pieces called modular panels. You build these at your shop. This is good if your shop has small doors or tight spaces. Most shops finish putting in the cooler in one or two days. If you choose a custom size, it might take longer. Always plan for delivery and setup before your busy times.
Tip: Clean up the area before you start. This helps the workers move faster and keeps your things safe.
Easy Cleaning & Service Access
It is important to keep your cooler clean. This keeps your food and equipment safe. Pick a cooler with smooth walls and rounded corners. These are easier to wipe down. Shelves you can take out help you clean every spot. Good lights help you see dirt and spills fast. Put the door where you can get to it easily. This makes cleaning and restocking quicker.
Service access is important too. Make sure you can reach the compressor and fans. This helps workers fix problems fast. You will not have to stop your shop for long.
Warranty & Support
Good support helps you worry less. Most companies give you different services:
Description | |
|---|---|
Installation | Experts set up your cooler for you. |
Repair | They fix problems fast so you can keep working. |
Preventive Maintenance | Regular checkups from trained workers. |
A good warranty pays for parts and work for at least one year. Some brands let you get a longer plan. Always ask about support before you buy. Fast repairs and regular checkups keep your cooler running well. You protect your cooler and avoid big repair bills.
Note: Keep your warranty papers in a safe spot. You might need them later for service.
Make Your Decision
Key Criteria Checklist
You want to feel sure about your choice before you buy. Use this checklist to help you review the most important points:
Check your storage needs. Think about the busiest times in your shop. Make sure your cooler can hold enough products.
Measure your space. Write down the length, width, and height of the area. Double-check for any obstacles.
Decide if you need a standard or custom cooler. Standard models work for most shops. Custom coolers fit special spaces or needs.
Plan your door placement and shelving. Make sure you can move items in and out easily. Good shelving helps you organize products.
Look for strong insulation and good cooling performance. This keeps your food safe and saves energy.
Review certifications like ETL, UL, and NSF. These show your cooler meets safety and health rules.
Think about design. A smart layout and good lighting make your shop look better.
Ask about installation, cleaning, and service. Easy access helps you keep your cooler in top shape.
Check the warranty and support. Good service protects your investment.
Tip: Use this checklist when you compare different coolers. It helps you focus on what matters most.
Confident Selection Tips
You can feel confident when you choose a walk-in cooler if you follow these expert tips:
Match the cooler to your needs. Look at your busiest sales periods. Make sure the right size cooler can handle your inventory.
Measure your space with care. Include room for ventilation and easy movement.
Plan for installation and maintenance. Check the electrical setup. Think about how you will keep the cooler running well.
Make your final choice with quality in mind. Pick durable materials and strong parts. This helps your cooler last longer.
Remember: Taking time to plan now saves you money and stress later. A smart choice keeps your shop running smoothly.
You can choose the best walk-in cooler for your deli business by following each step in this guide. Review your needs, measure your space, and compare features. Use the checklist to stay organized. Ask questions about installation and support. When you plan carefully, you make the process simple. You protect your products and save money. Trust your decision and enjoy a cooler that fits your shop.
FAQ
How often should you clean your walk-in cooler?
You should clean your walk-in cooler once a week. Wipe down shelves and walls. Sweep and mop the floor. Regular cleaning keeps food safe and helps your cooler last longer.
What temperature should you set for your walk-in cooler?
Set your walk-in cooler between 35°F and 38°F. This range keeps most foods fresh and safe. Use a thermometer to check the temperature every day.
Can you install a walk-in cooler yourself?
You can install some small coolers yourself. Most shops need a professional for safe and correct installation. This ensures your cooler works well and meets safety codes.
What should you do if your cooler stops cooling?
Unplug the cooler and check the power supply. Make sure the door closes tightly. If the problem continues, call a service technician. Do not store food until the cooler works again.
See Also
A Complete Guide to Selecting Your Walk-In Cooler
Tips for Finding the Best Walk-In Cold Room
Overcoming Storage Issues with a Restaurant Cold Room